DreamForge is the control surface. The ComfyUI server you run is the engine. Partner models also use a Comfy account API key, so the server address and account key go in different Settings fields.
Run ComfyUI on the machine that will serve DreamForge. It must listen beyond localhost so your iPhone or iPad can reach it.
comfy launch -- --listen 0.0.0.0 --port 8188
B
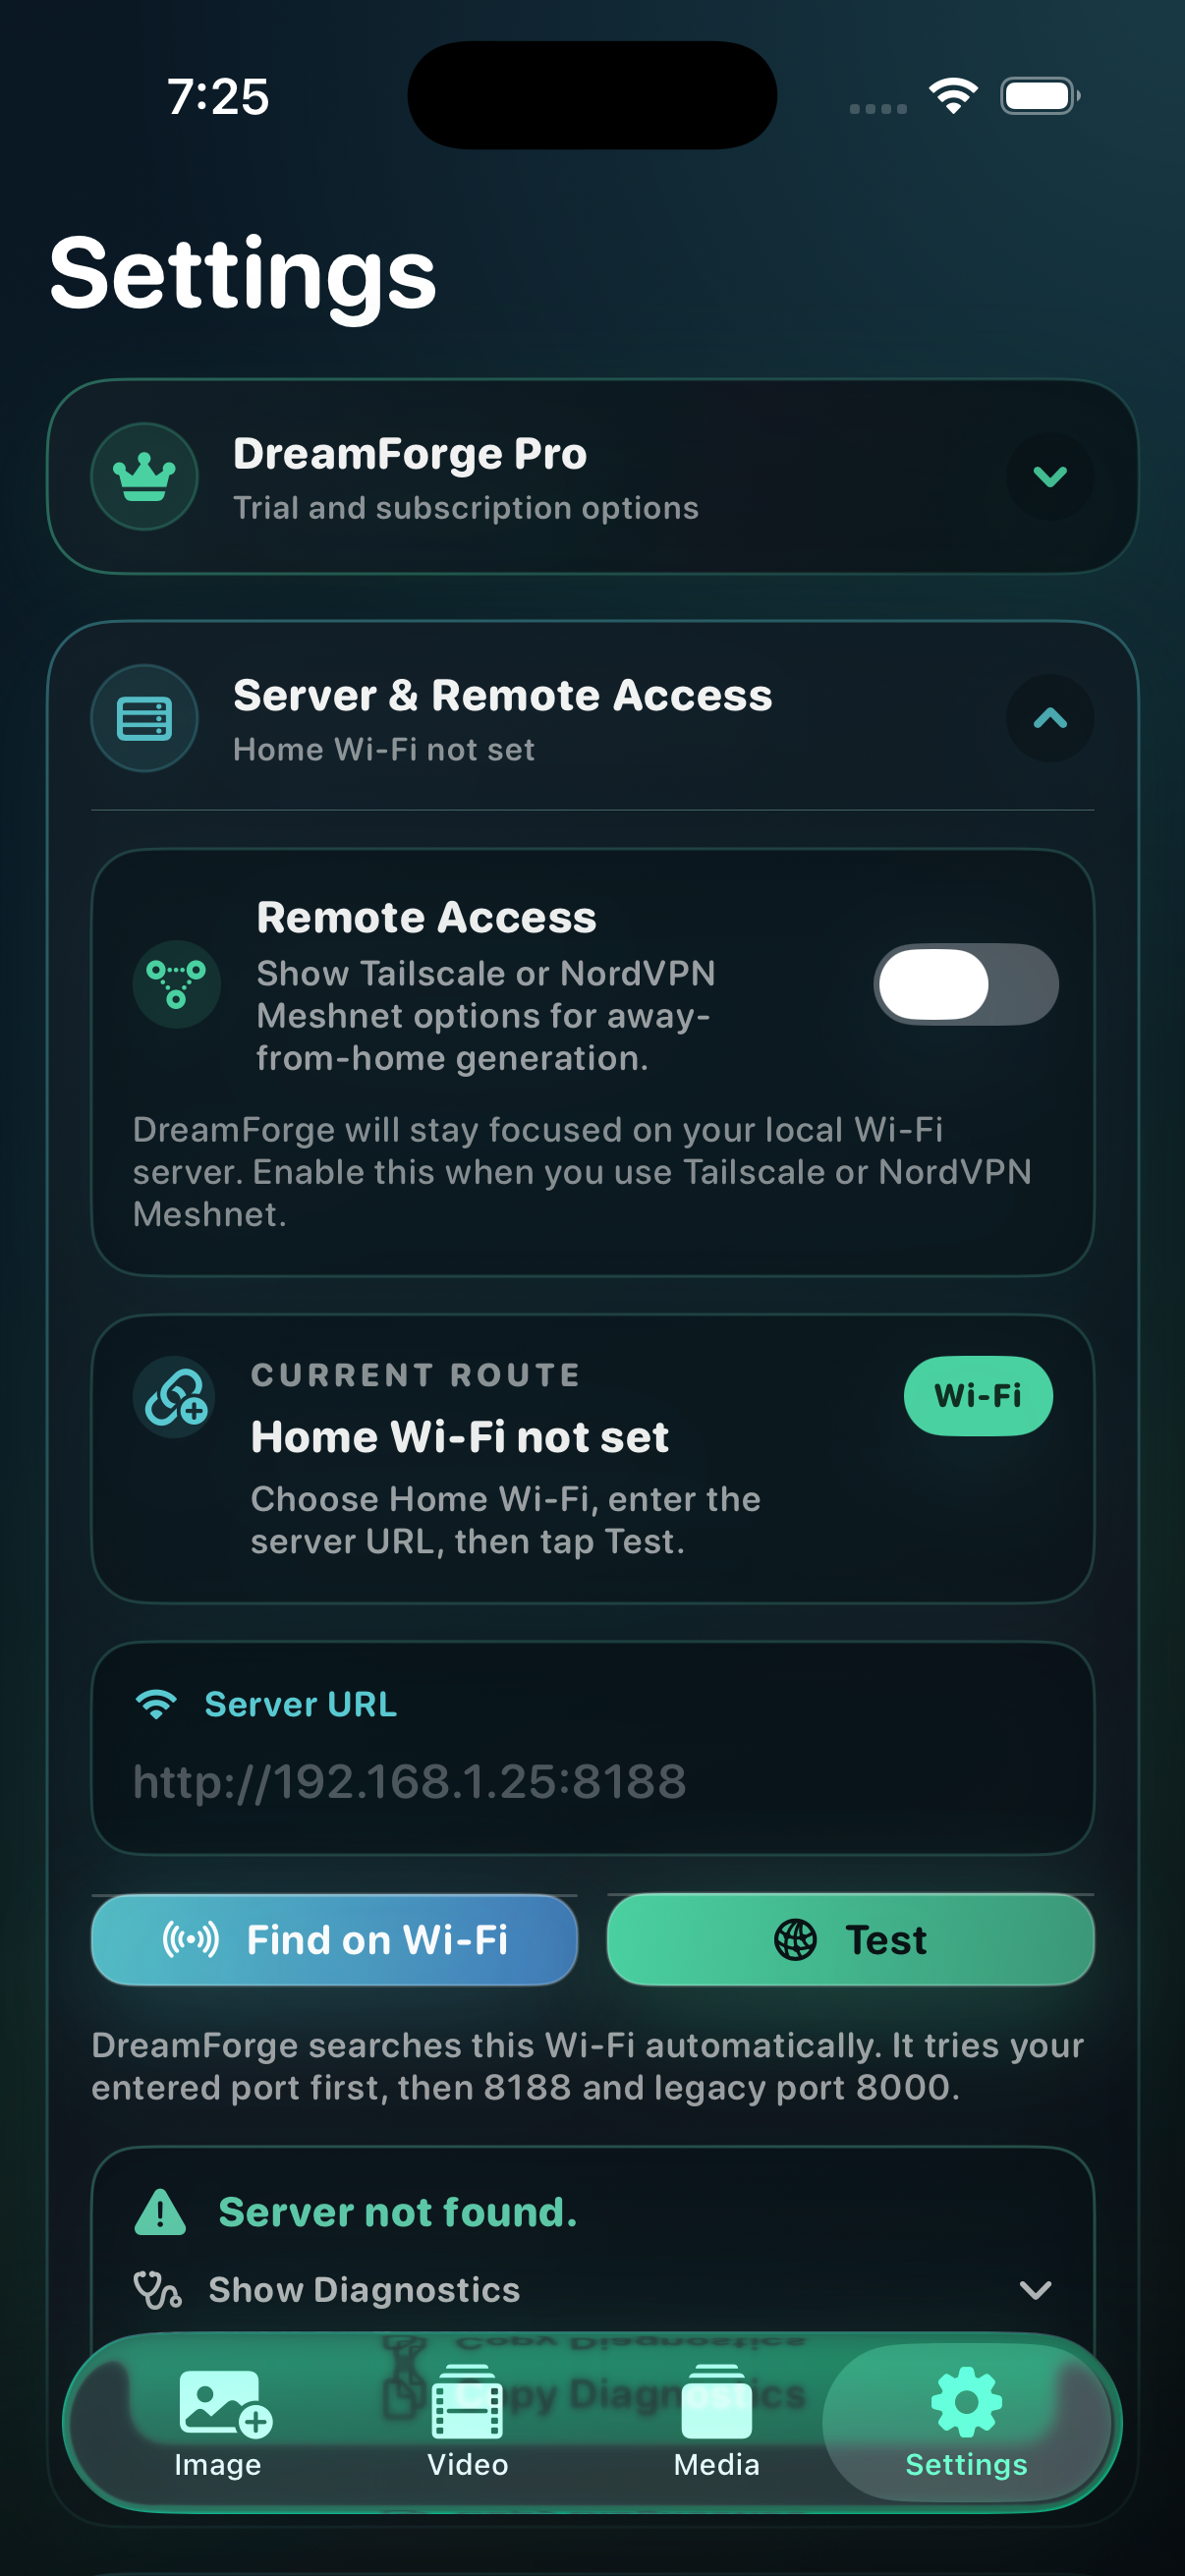
Find or enter the Server URL
On home Wi‑Fi, tap Find on Wi‑Fi or enter the server machine’s local address, such as http://192.168.1.25:8188. DreamForge preserves any port you enter. Do not use 127.0.0.1 on a real iPhone or iPad; that address points back to the device itself.
C
Create your Comfy account key
Sign in or register at platform.comfy.org, open the API Keys page, create a key, and copy it somewhere private.
Paid partner nodes use credits from your Comfy account. Add or review credits in ComfyUI under Settings → Credits. In DreamForge Settings, save the Server URL and API Key in their separate fields, then test the connection and key.
Find ComfyUI on local Wi‑Fi, preserve a custom port, test the route, and copy detailed diagnostics when something needs attention.
GOOD TO KNOW
Running ComfyUI yourself does not make outside partner APIs free. Their paid nodes spend Comfy Credits when they execute. Costs vary by model and settings, and provider rules still apply.
02 / REFERENCES
Bring in the visual direction.
Import from Apple Photos, capture a new reference with the camera, or start DreamForge's temporary Wi-Fi Import page and send supported files from another device. Imported images are copied into DreamForge's own app library rather than using Photos as the live working library.
Reference library
Keep inspiration and reusable visual inputs separate from generated creations.
Wi-Fi Import
Keep the iPhone or iPad awake during the session. Supported formats include JPG, JPEG, PNG, HEIC, HEIF, and WEBP.
IN THE APPREFERENCE BOARD
03 / IMAGE STUDIO
Direct the image.
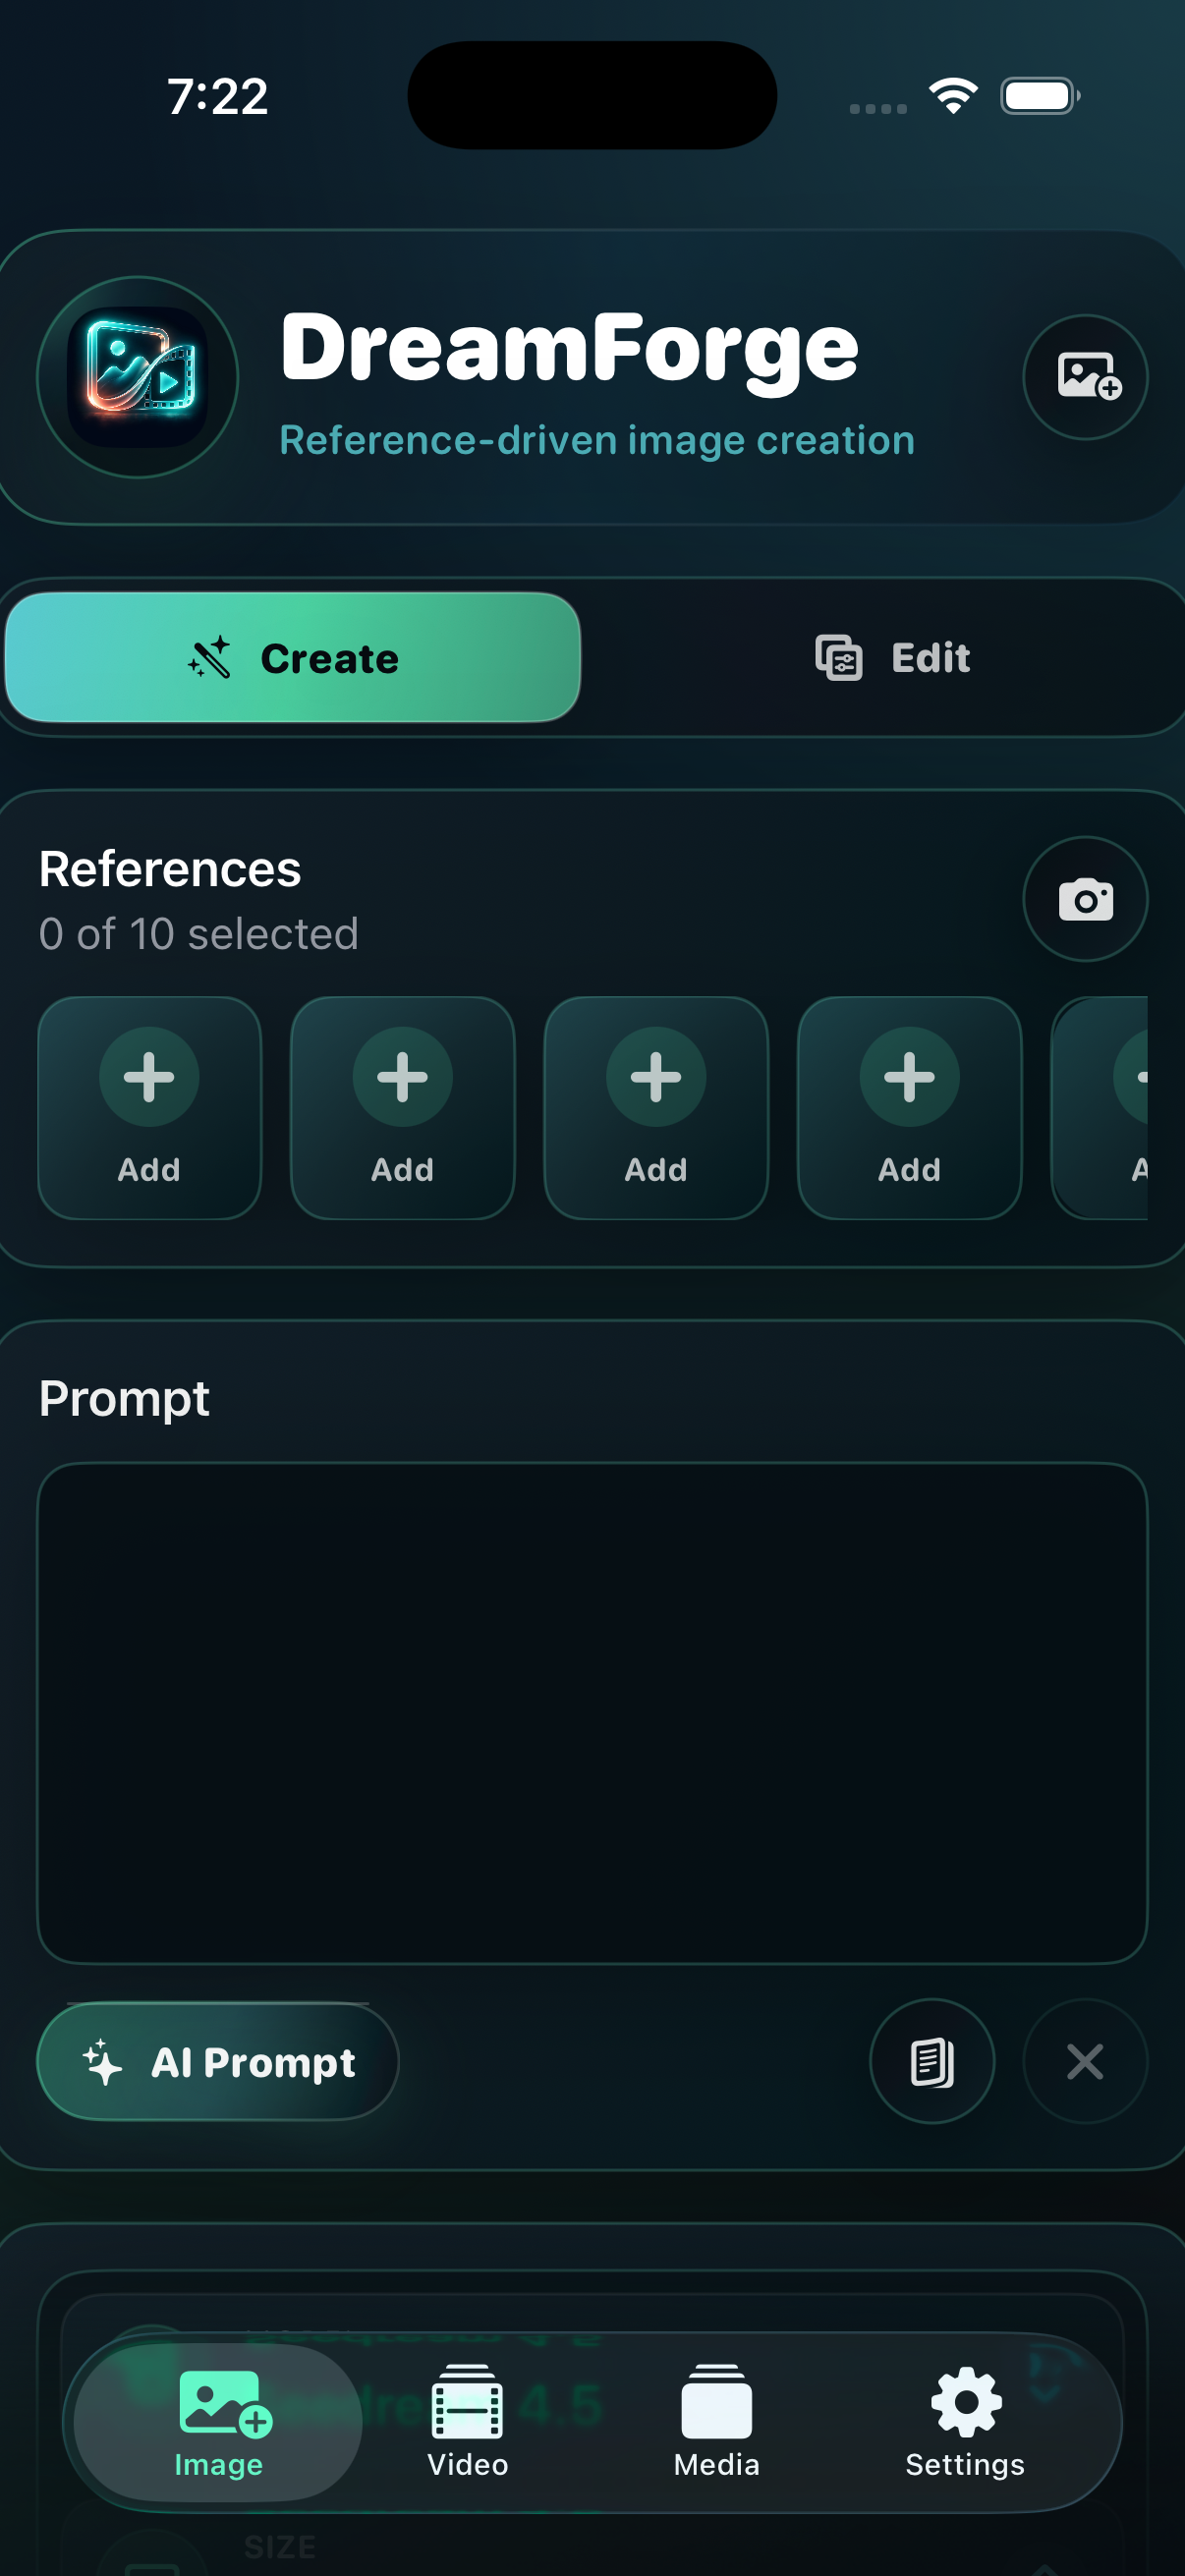
Open Image, choose Create, add the references supported by the selected model, write the prompt, choose a size and output count, then tap Generate. DreamForge prepares the model-specific workflow and sends it to your ComfyUI server.
Use AI Prompt when you want help studying a reference or shaping rough intent. Open Shot Builder when you want optional camera distance, angle, pose, expression, lens, and lighting language. Switch to Edit when an existing image needs the next pass.
Up to 16 referencesCamera captureAI PromptPremium pickersMultiple outputsShot BuilderEdit workspace
IN THE APPIMAGE STUDIO
AN IMAGE PROMPT TO TRY
“A glass observatory overlooking the ocean at blue hour, warm interior lights, wide editorial composition, subtle sea haze.”
04 / VIDEO STUDIO
Choose how the frame moves.
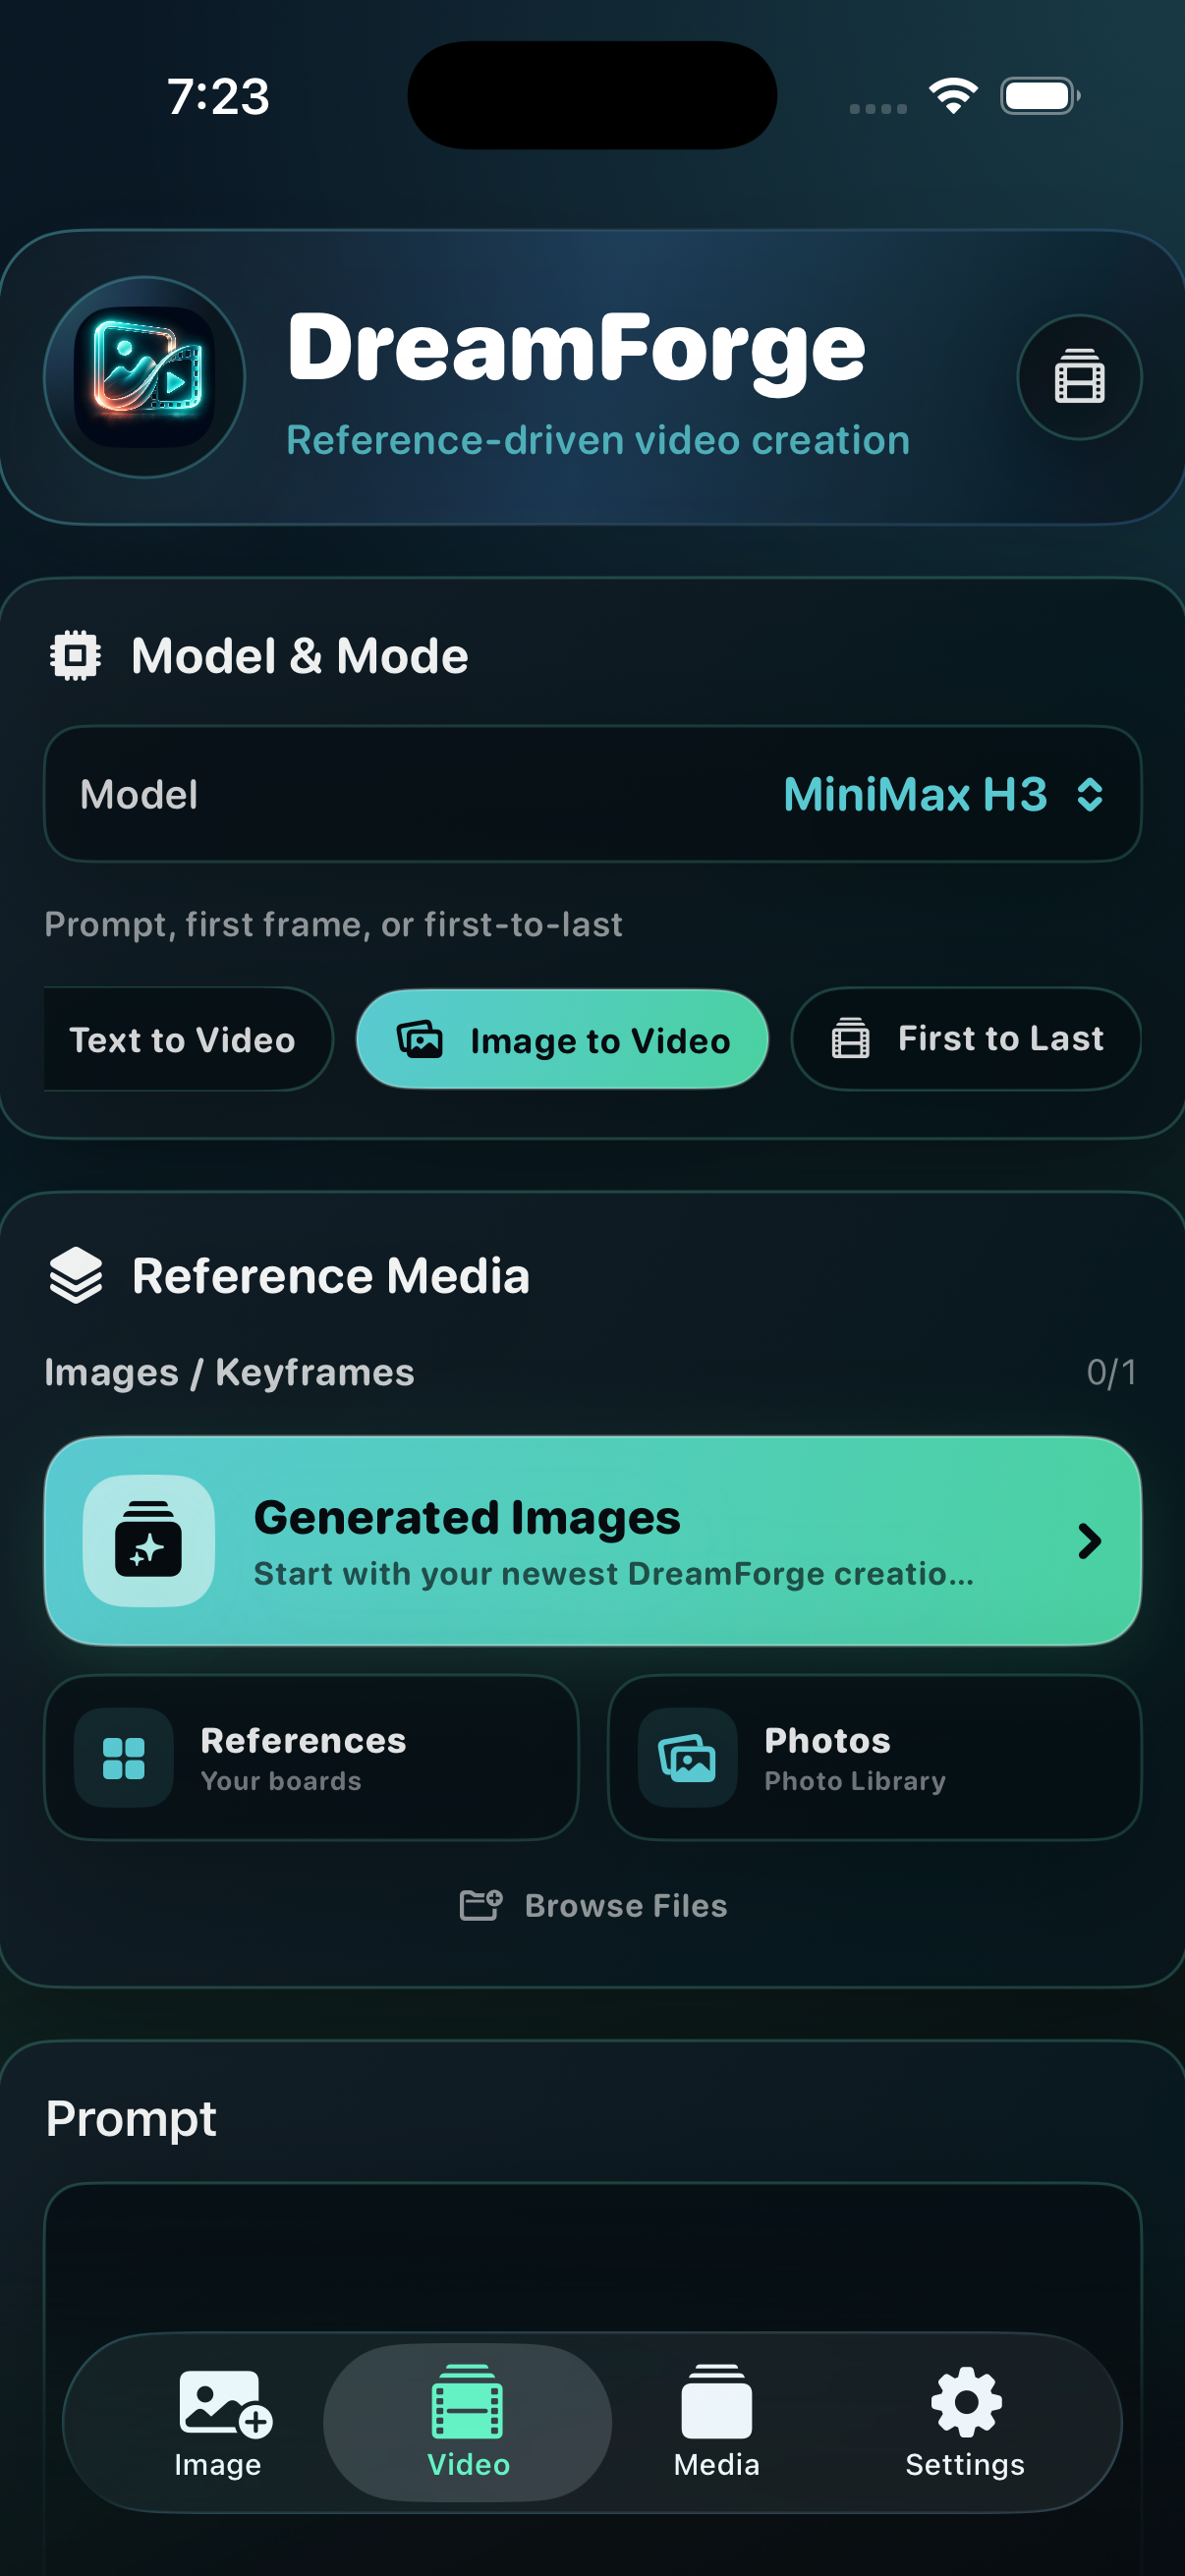
Start with a video model, then select one of its supported modes. Depending on the engine, DreamForge can begin from text, one image, first-and-last frames, as many as ten keyframes, rich reference sets, an existing clip, or audio.
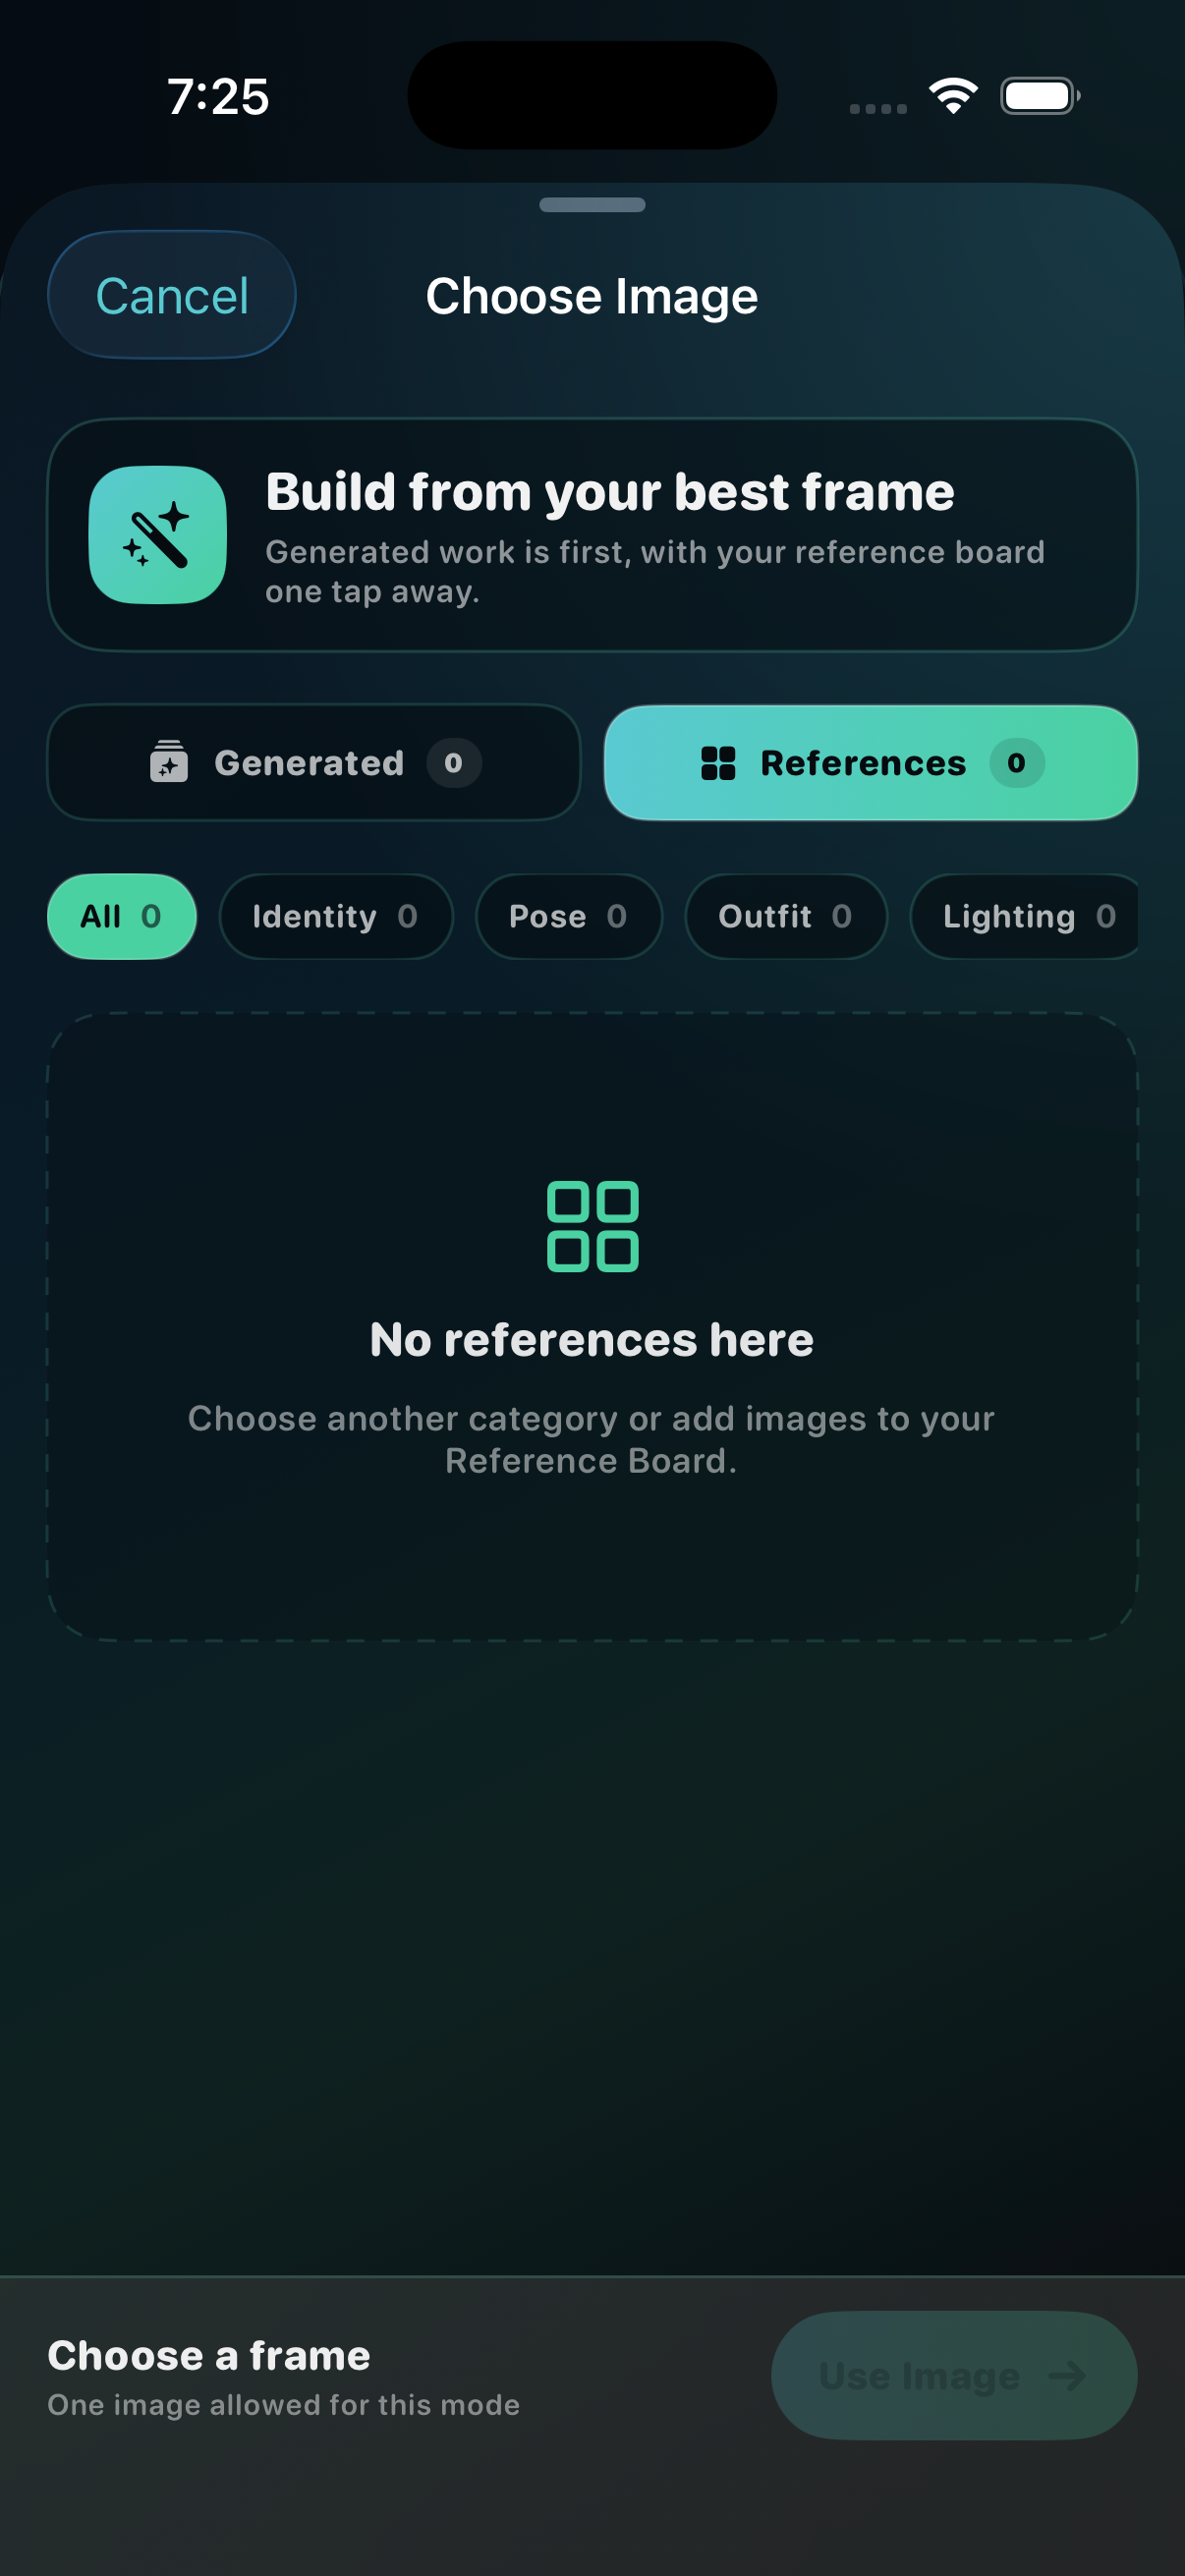
Generated images are prioritized in the visual picker because they are often the natural starting point for motion. Reference Boards, Photos, and Files remain one tap away.
Text to VideoImage to VideoFirst to LastContinuationReference to VideoAudio to VideoEdit Video
IN THE APPVIDEO STUDIO
MODEL-AWARE
Aspect ratio, resolution, duration, audio, keyframes, source media, and advanced controls appear only when the selected video model and mode support them.
05 / MEDIA
Keep every useful result in reach.
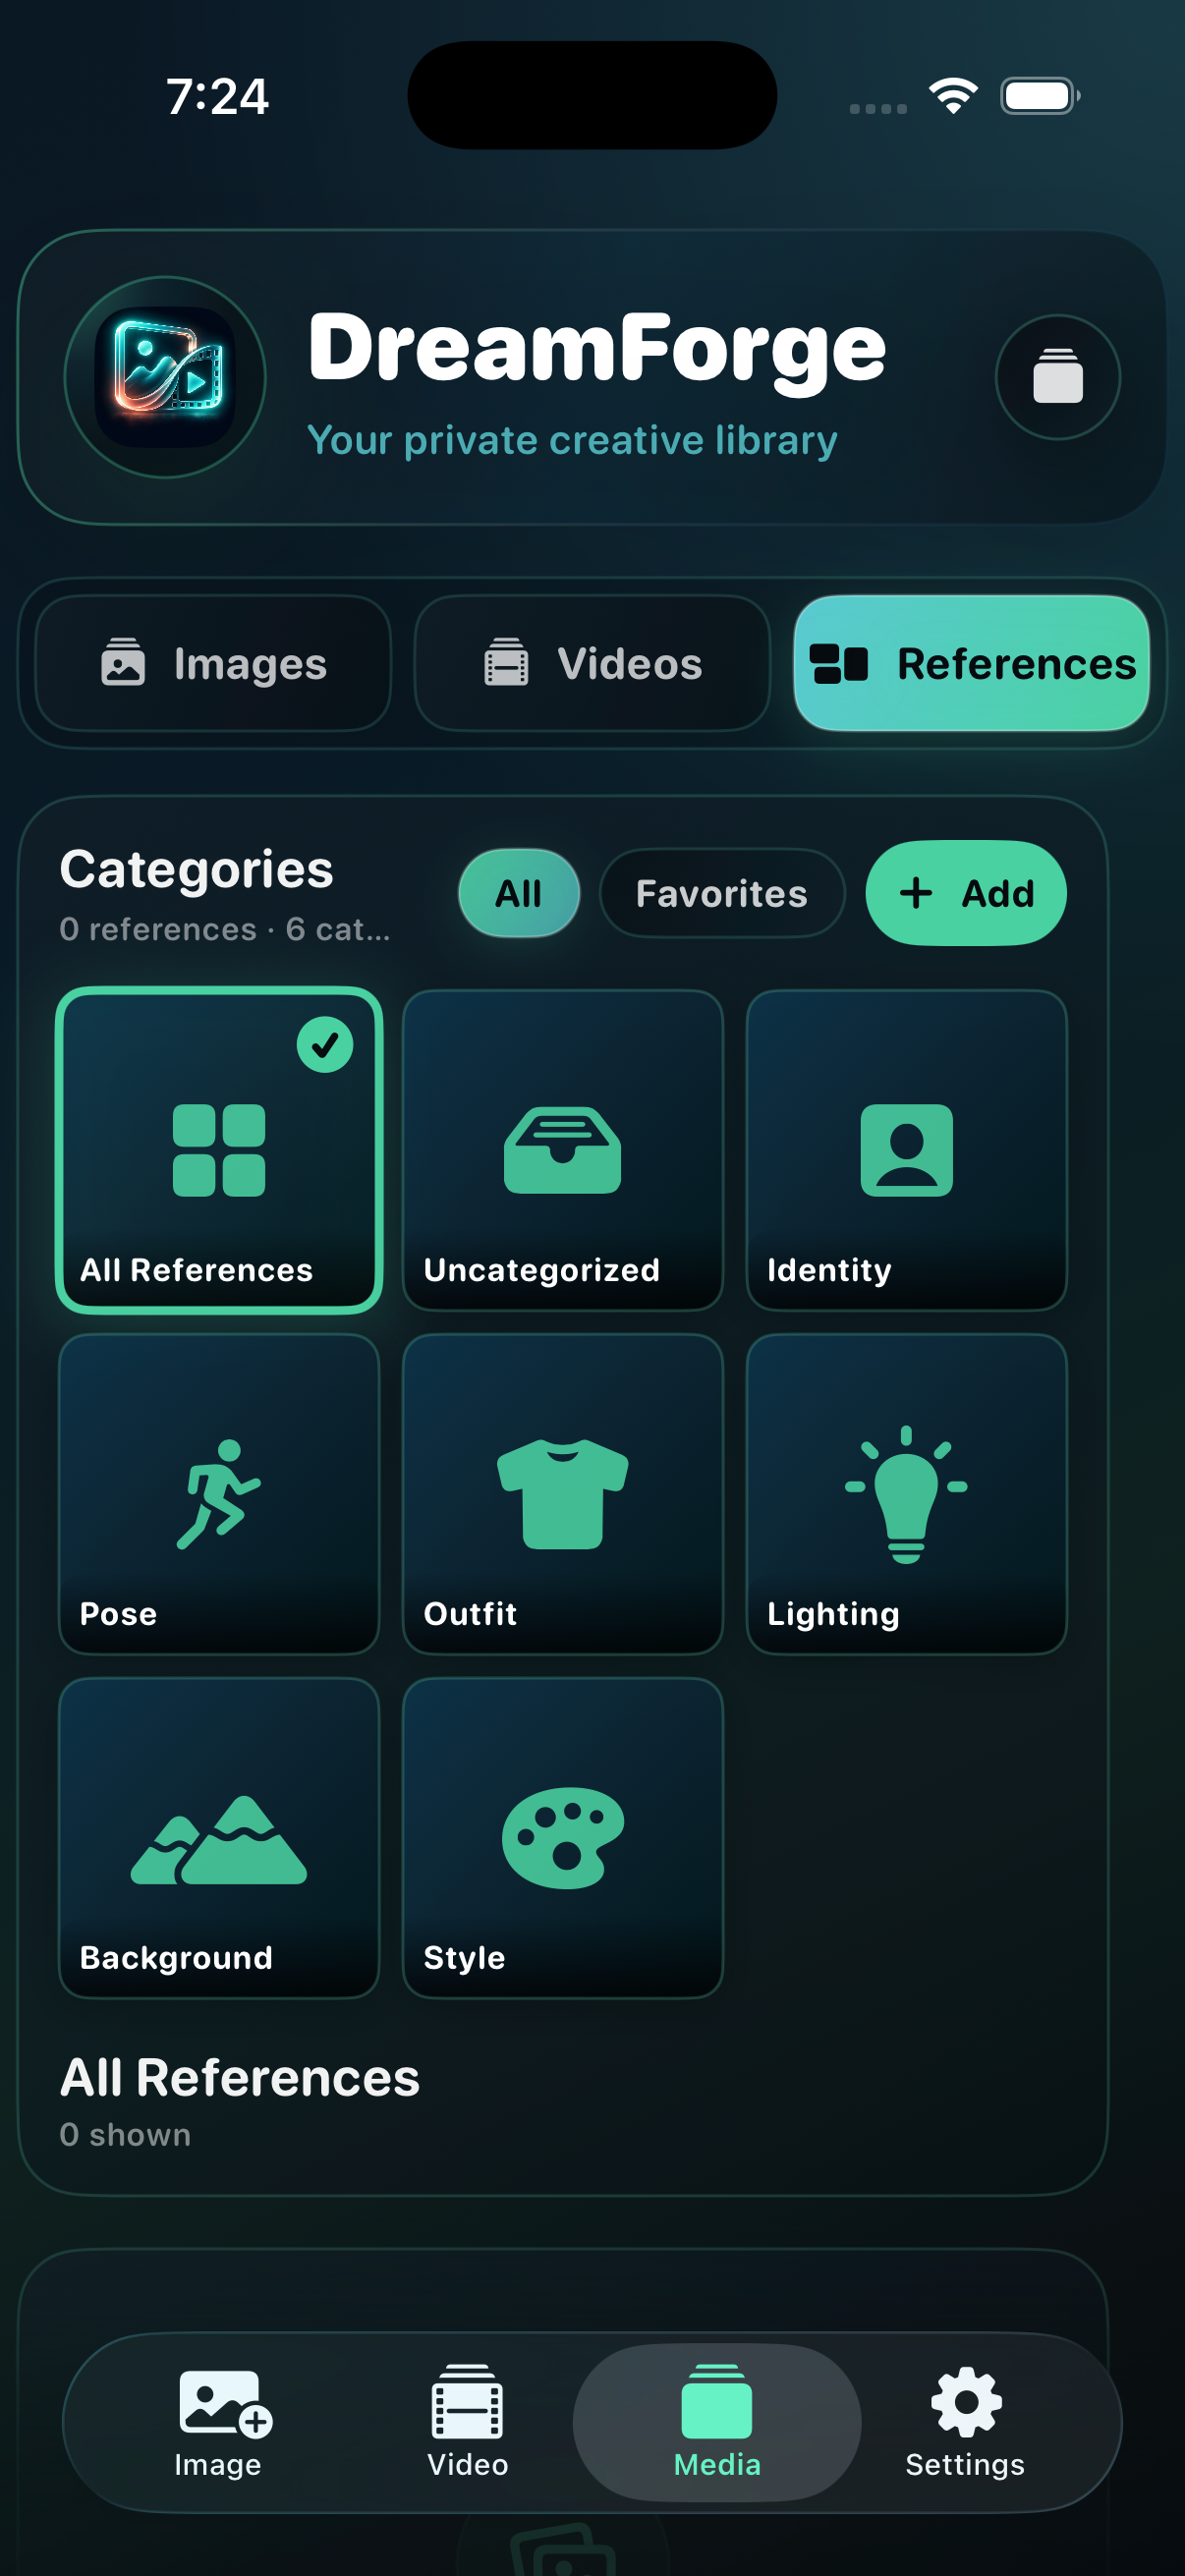
Media brings generated images, created videos, and imported references into one organized home. Preview horizontal video in landscape, build image collections without duplicating files, and keep reusable references in visual categories.
Long-press a category to edit, move, reorder, or delete it. The dedicated move interface lets you drag categories into place without crowding the main Reference Board.
Review creations and send a strong still directly into the next video workflow.
Reference Board
Organize reusable faces, poses, outfits, lighting, backgrounds, styles, or your own category system.
IN THE APPVISUAL PICKER
06 / REMOTE ACCESS
Take your private route with you.
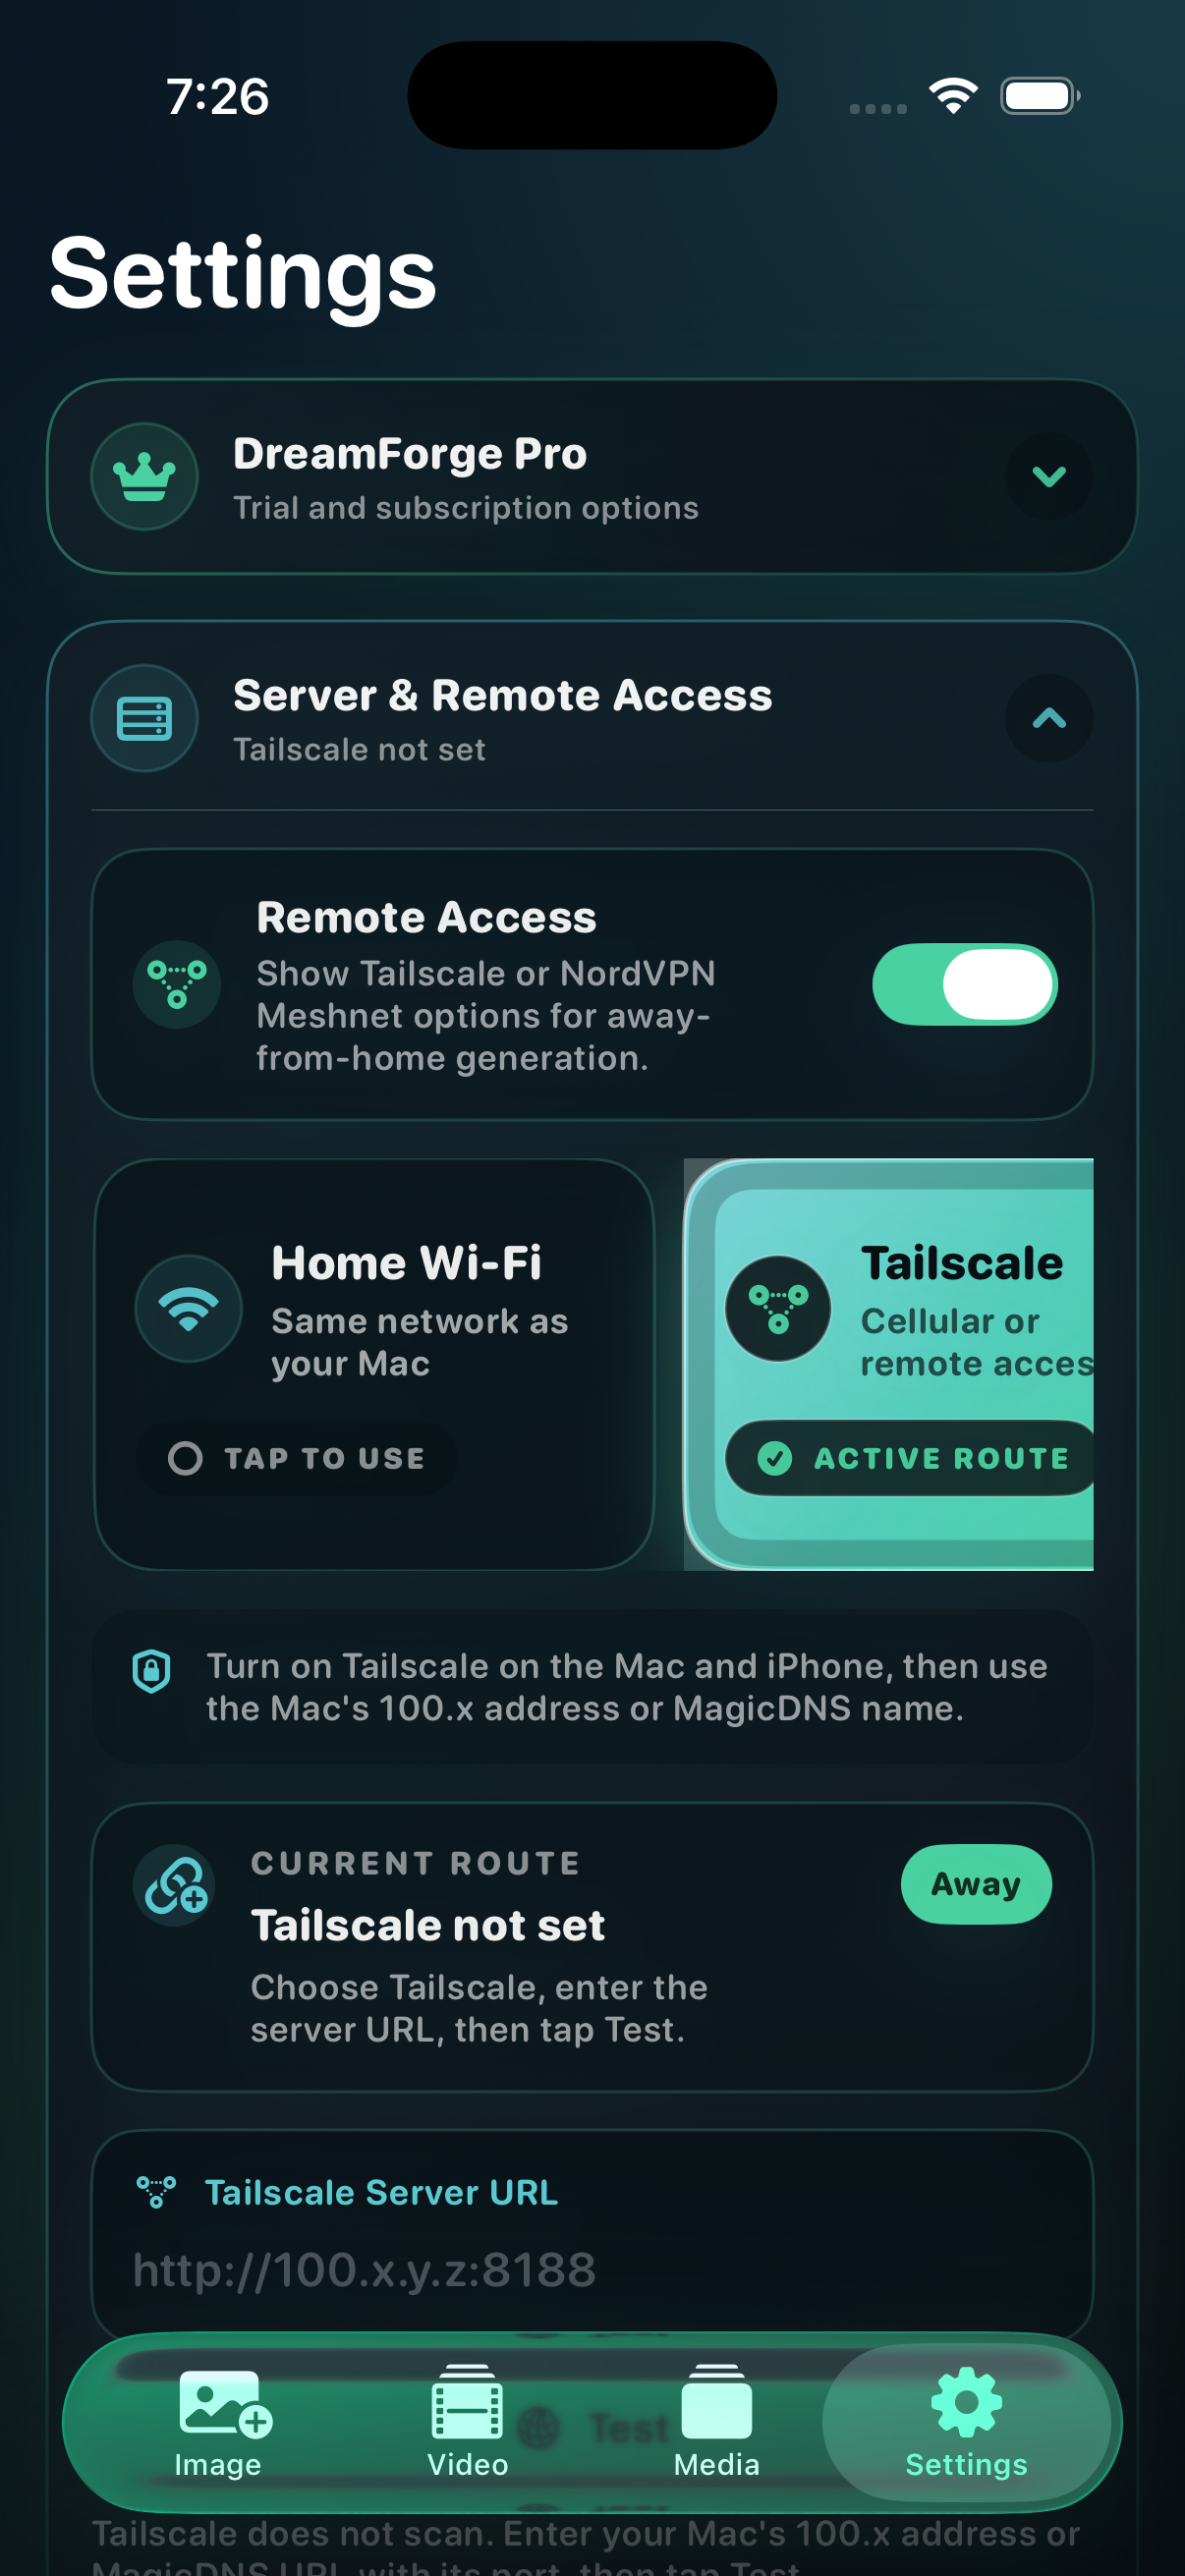
Home Wi‑Fi is the easiest connection. Away from home, DreamForge can use Tailscale or NordVPN Meshnet. Automatic discovery scans only the current Wi‑Fi subnet, so private mesh addresses are entered manually.
Tailscale
Connect Tailscale on the ComfyUI machine and iPhone or iPad.
Turn on Remote Access and choose Tailscale.
Enter the Mac’s 100.x address or MagicDNS name with its actual port.
NordVPN Meshnet
Enable Meshnet on both devices; a normal country VPN connection is not enough.
Choose NordVPN in DreamForge.
Enter the Mac’s Meshnet IP or .nord hostname with its actual port.
IN THE APPPRIVATE ROUTES
ROUTE FIRST
If Safari cannot reach the server URL from the device, DreamForge cannot reach it either. Confirm the network path before troubleshooting a model.
07 / PRIVACY & PROVIDERS
Know where selected content goes.
DreamForge sends the prompts, images, videos, or audio you select to the ComfyUI server you configure. If that workflow uses outside partner API nodes, the selected content may be uploaded to that provider for generation, editing, or enhancement.
Kept under your control
Photos import and export are user initiated.
DreamForge does not automatically export every generation.
Keys entered in DreamForge are stored in Apple Keychain.
Choose the workflow you want
Eventide Labs does not operate your personal ComfyUI server by default. For fully local generation, use ComfyUI workflows that do not call outside API nodes.
TROUBLESHOOTING
Fast checks. Clear next steps.
Most issues come down to server reachability, local network permission, a private route, API authorization, credits, or the workflow itself.
Could not reach ComfyUI+
Confirm ComfyUI is running with --listen 0.0.0.0. Use a full URL with http:// and the correct port. Open that exact URL in Safari on the device. Avoid 127.0.0.1 on a real iPhone or iPad.
Safari works but DreamForge does not+
Match the DreamForge URL to Safari exactly, including its port. If using a mesh VPN, enable Remote Access and select the matching route. Tap Test again and use Copy Diagnostics if it still fails.
Wi-Fi scan does not find the server+
Wi-Fi scanning checks only the local network. Enter the server machine's local IP manually, confirm both devices are on the same Wi-Fi, and make sure Local Network permission is enabled for DreamForge.
Tailscale or NordVPN does not work+
Confirm the same private mesh is active on both devices. For NordVPN, Meshnet must be enabled—a normal country VPN connection does not expose your Mac. Open the exact mesh URL in Safari first, then select the matching DreamForge route and tap Test.
Not authorized or API key errors+
Check the API key saved in DreamForge and any key configured directly in the ComfyUI node. Confirm your Comfy account has credits and the selected model uses the provider account you expect. Test the workflow in ComfyUI when possible.
Generation starts but no media appears+
Check the ComfyUI console for node errors, missing custom nodes or model files, confirm the output folder is writable, and verify the selected image, video, and audio inputs stay within the model’s displayed limits.
Wi-Fi Import does not open or a file fails+
Keep DreamForge's Wi-Fi Import session running and the device awake, use another device on the same Wi-Fi, and copy the address exactly. For failed files, review the Needs Review count or export the file as PNG or JPEG and try again.
READY TO CHOOSE THE ENGINE?
Pick the right tool for the frame.
Explore every image model, video engine, reference limit, and supported creation mode in DreamForge Studio.